
Photo by Thomas Jensen on Unsplash
Setting up a single Splunk Forwarder to send different data to multiple indexes
... using logs generated by Suricata in a pfSense router VM.


Pre-requisites:
Have a working Splunk instance (Splunk Enterprise, in my case) to connect to. There are plenty of tuts for this online.
Have installed a universal forwarder on the endpoint that you want to monitor (see here, an excellent post which will get you most of the way through setting up Splunk to analyse Suricata & pfSense logs)
Note: There are some steps specific to my use case, which are marked accordingly with [OPT]. These can be ignored if just trying to configure a universal forwarder to send data to multiple indexes in Splunk.
Steps:
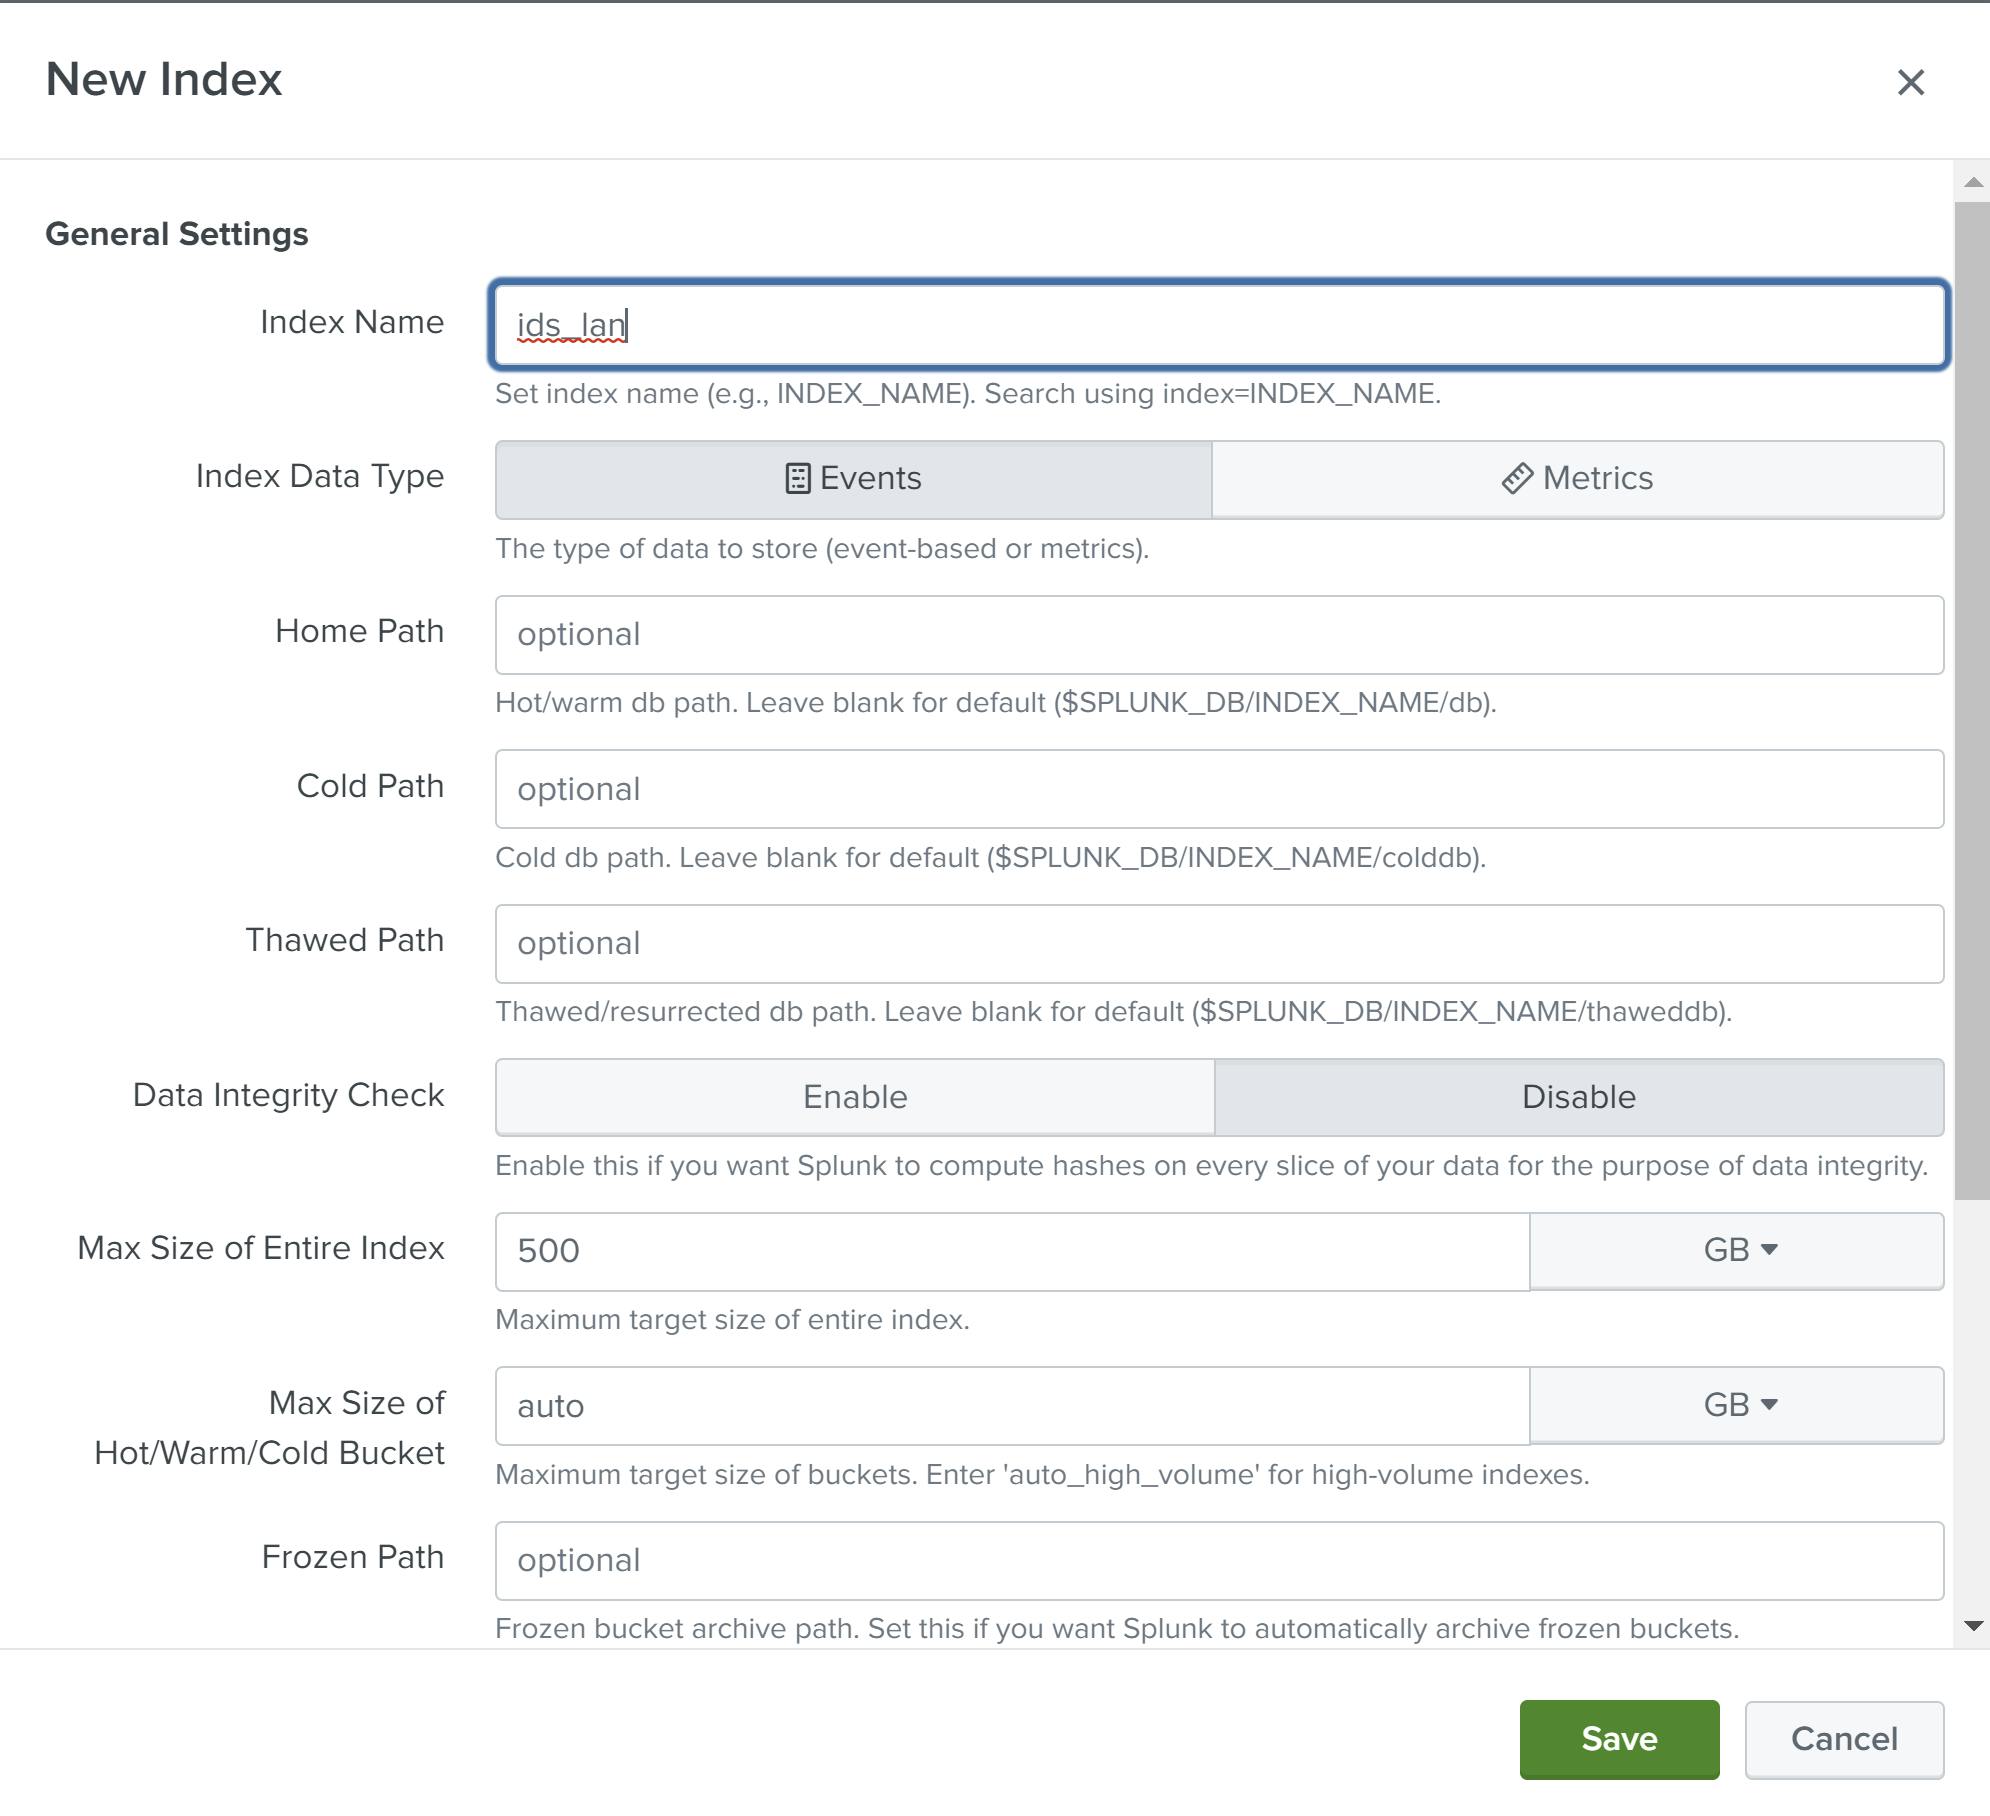
Create the desired index in Splunk (Settings --> Indexes). I named mine
ids_lanas I am using an Intrusion Detection System (IDS) to monitor my LAN network on pfSense. You can leave all the index settings as default for now.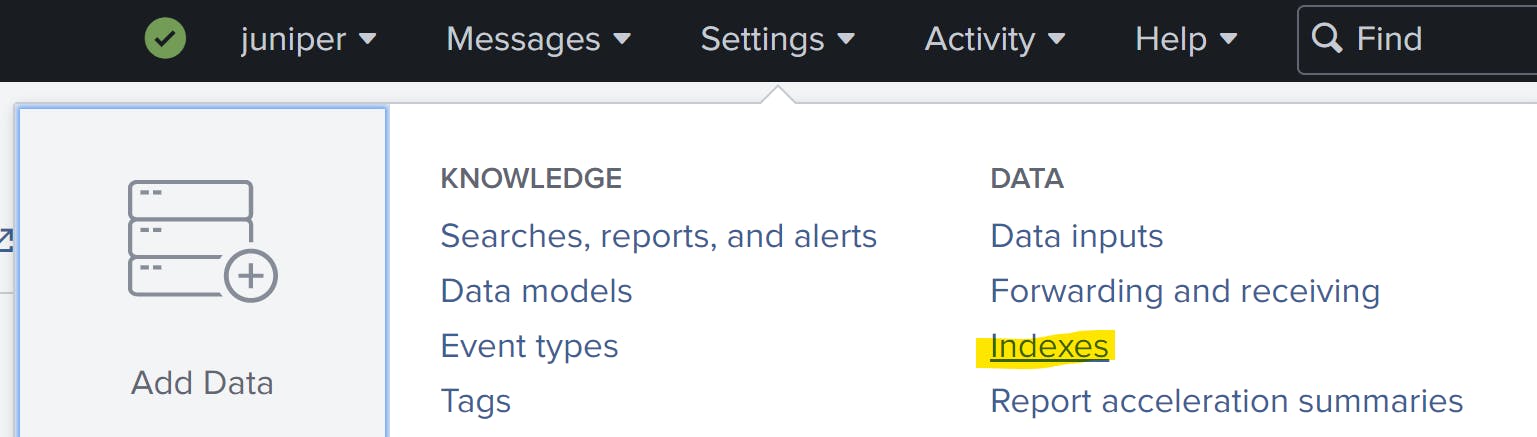
[OPT] Go to pfsense web UI, and create & configure the instance that you want to monitor. Once up and running, go to 'Logs View' and select the instance to view.
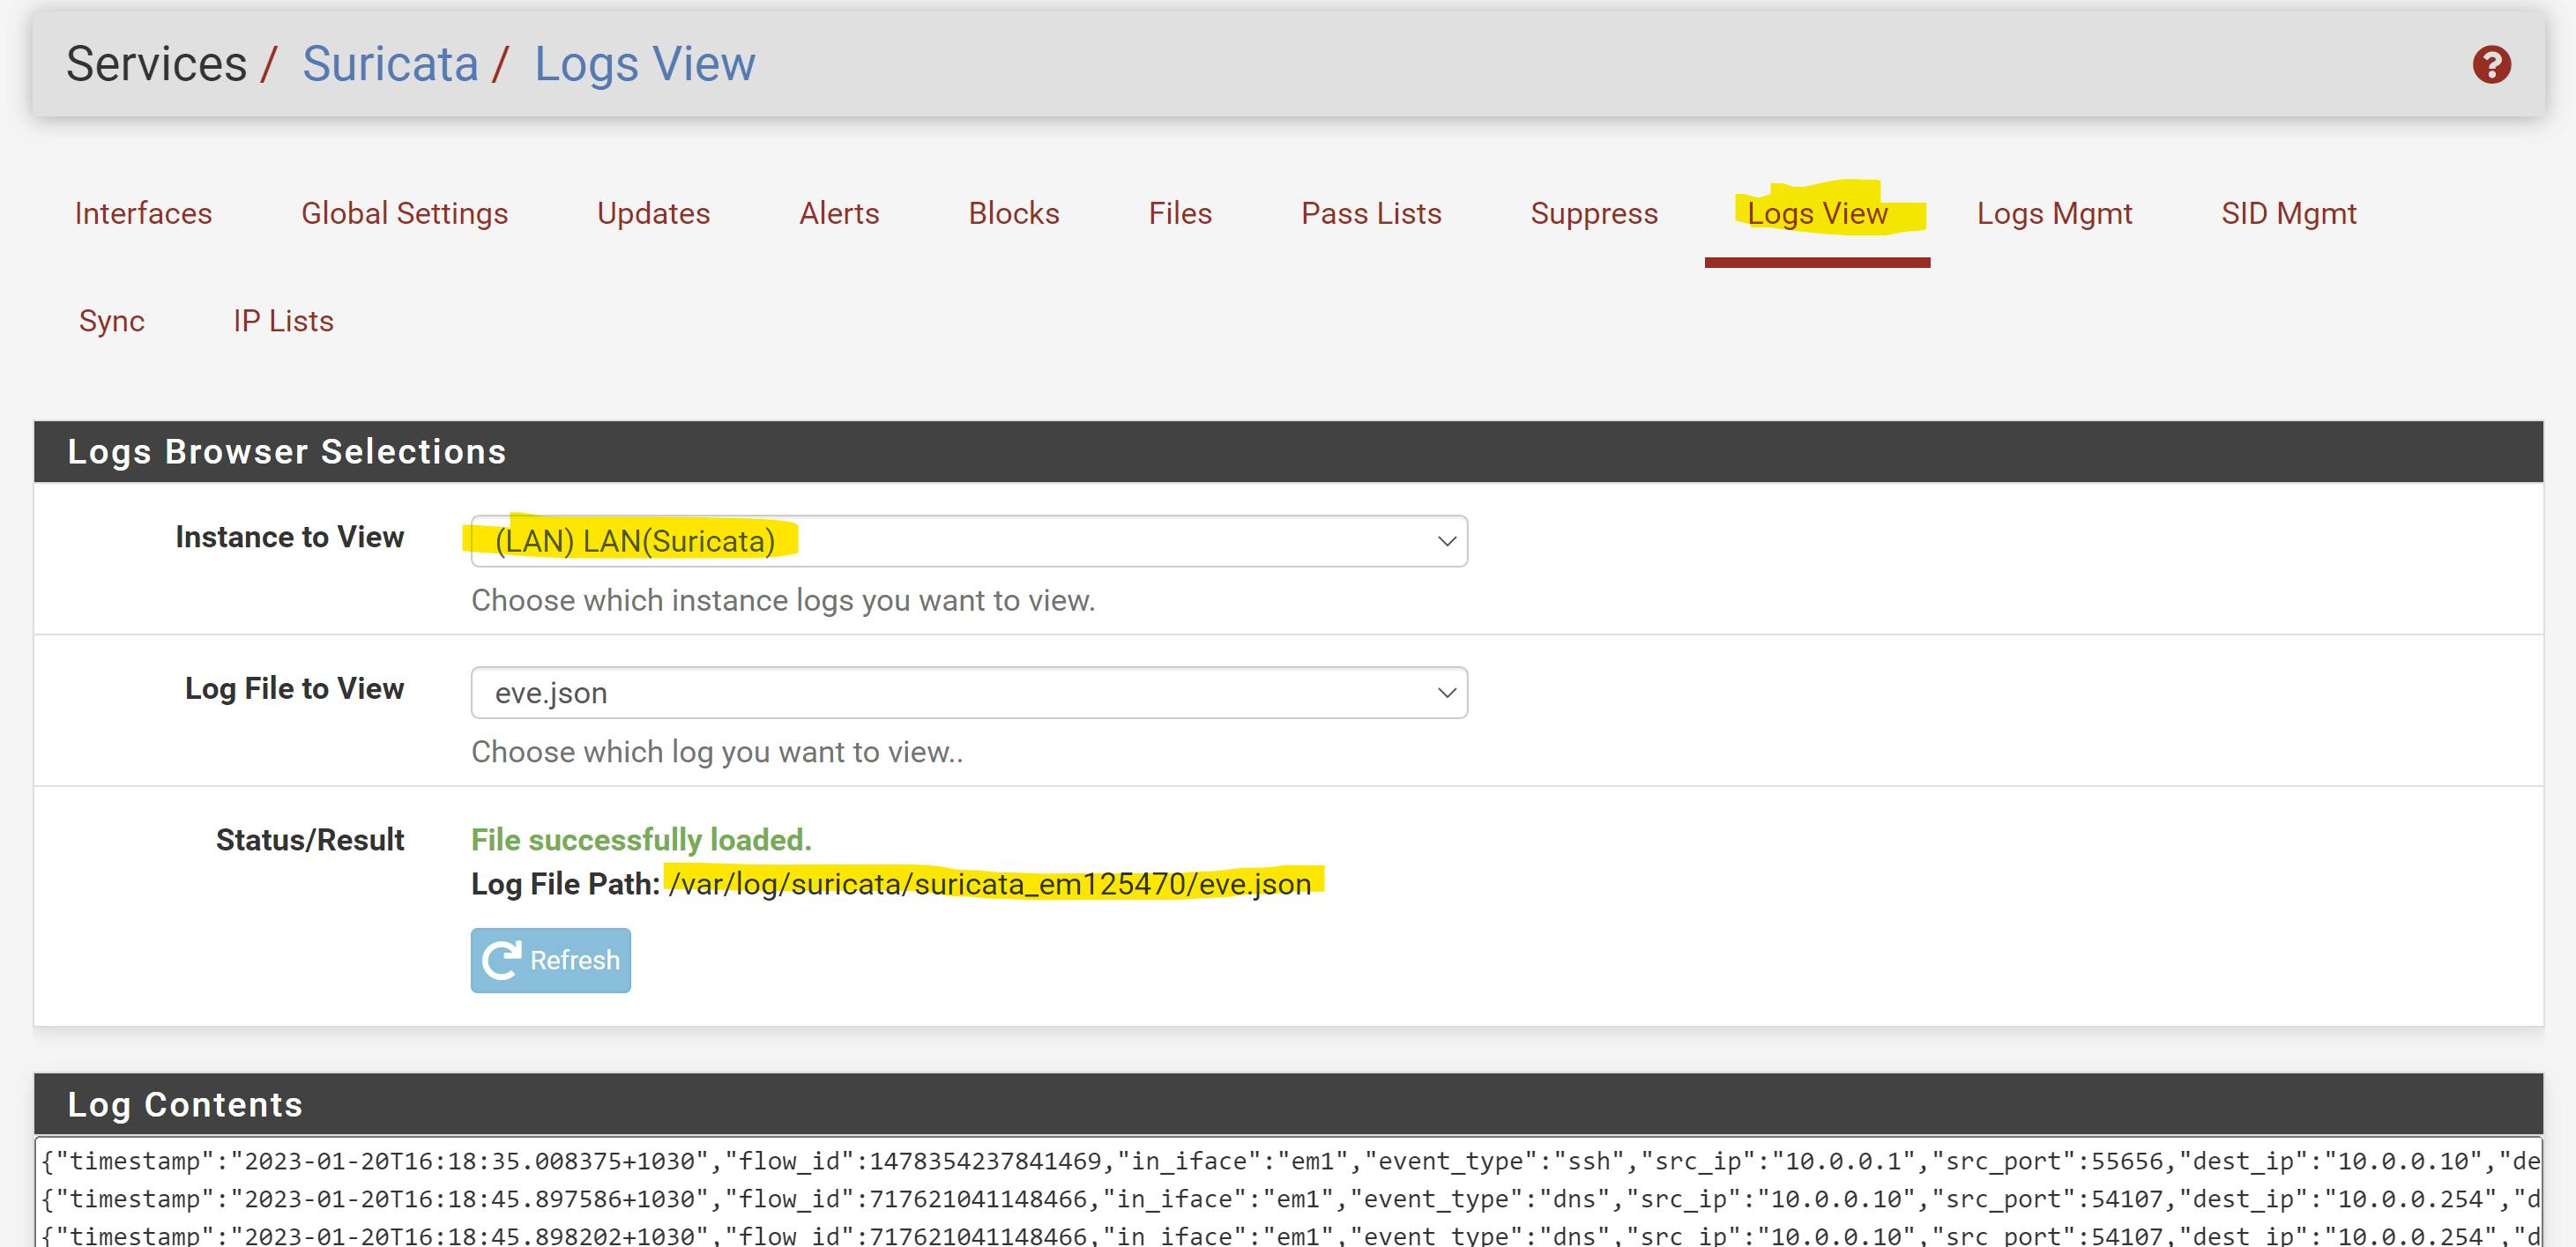
Note the file path and importantly, the folder name where logs are sent for that instance. Mine path is /var/log/suricata/suricata_em125470/eve.json and the folder name is suricata_em125470.
- SSH into your VM/machine with the splunk forwarder installed and modify the
inputs.conffile. In my case it's found in/opt/splunkforwarder/etc/apps/TA-Suricata/default, but that's because I'm using the TA-Suricata app to make my Suricata logs Splunk-readable (matching Splunk's Common Information Model [CIM]).
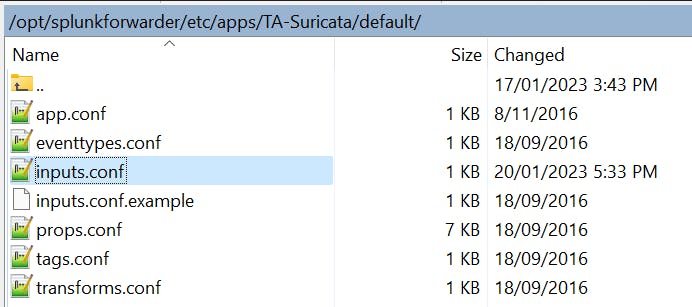
In most cases, you should navigate to /opt/splunkforwarder/etc/system/local and create an inputs.conf file if there isn't already one. This overrides all of the defaults located in /opt/splunkforwarder/etc/system/default, and it's best practice to modify files within /local instead when you're not using an extra app like I am.

Within the
inputs.conffile, create entries like so (as many as needed), making sure to reference the new folder that was created in step 3 (suricata_em125470).Additionally, set
index = ids_lan, or whatever index you created in Step 1.
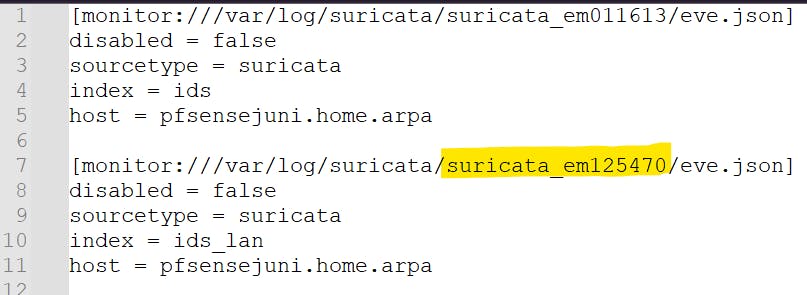
For a more general installation, here is some sample code (excluding suricata-specific options).
Code Dump:
[monitor://path_to_your_monitored_file_here]
disabled = false
index = your_index_from_step_1
host = your_splunk_instance_name
(Your splunk instance name is found by going to Settings --> Server Settings --> General Settings in the splunk web UI**)
- Navigate to the
/opt/splunkforwarder/bin/directory and run the command./splunk restartto restart the splunk forwarder. A reboot of the system is (likely) not sufficient.

Upon restarting, within the same directory (
/opt/splunkforwarder/bin/) check that Splunk is running with./splunk status. If it isn't, run./splunk start. Verify there are logs in the folder you just linked to (in my case,suricata_em125470), which can be done either by navigating to the path where they are stored, or in my use case, via Log Contents in the pfSense web UI (see step 3).Wait a few minutes or so, and then run a splunk search for a timeframe for which you know there are log entries for, with something like
index="your_index_from_step_1". Check the time stamp matches when you expect the last log to have been from, and voila!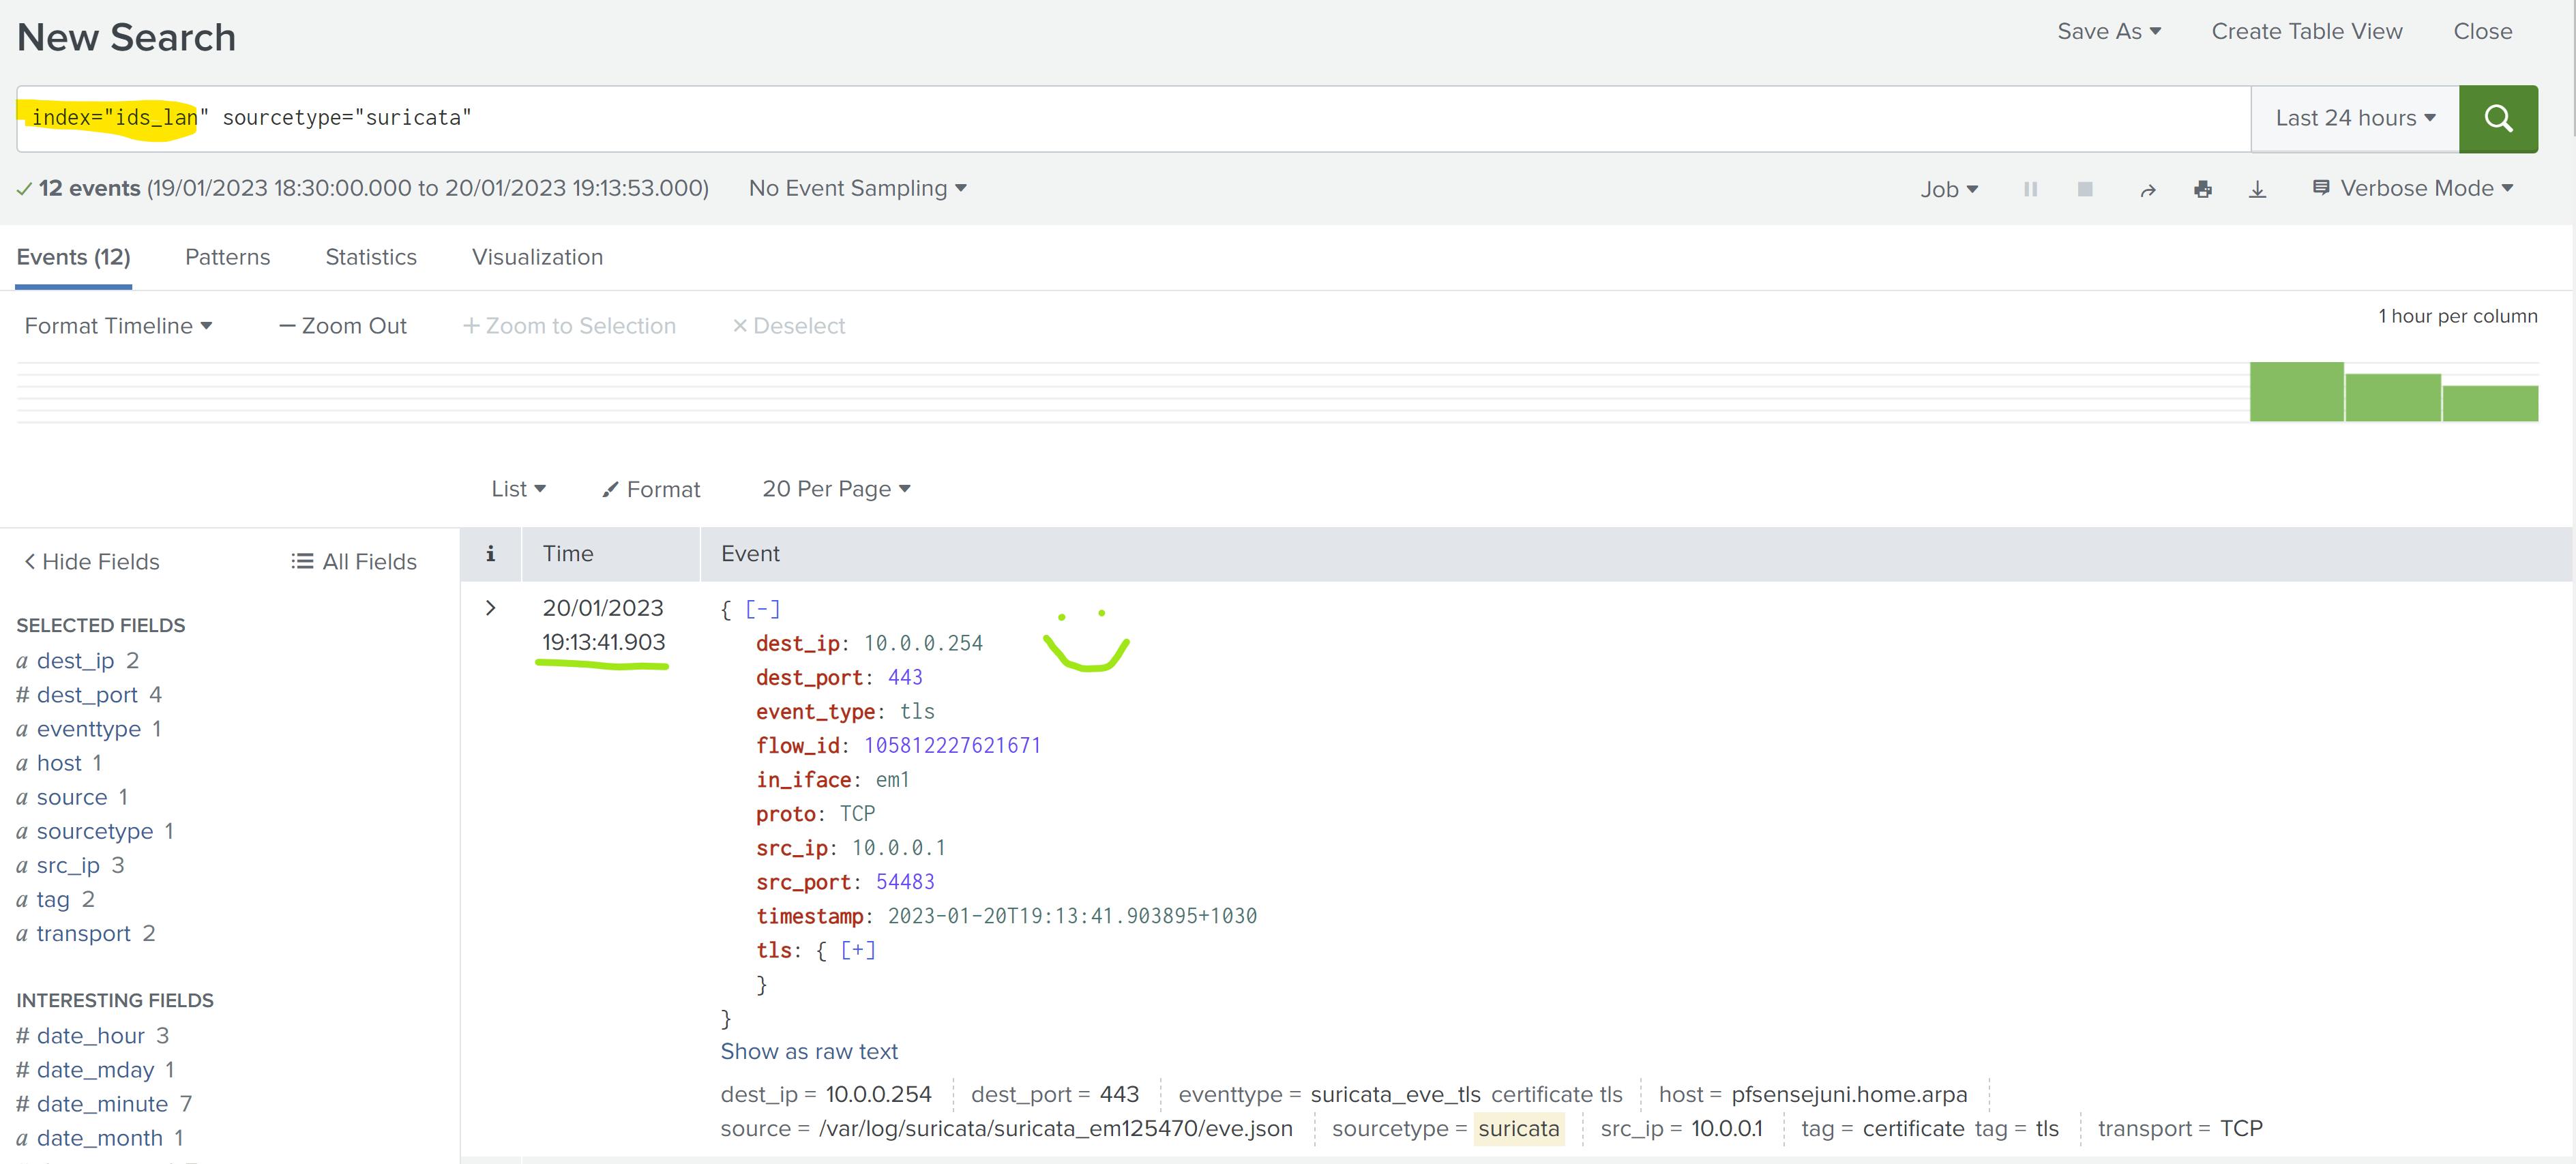
💛 Best of luck, I hope this helps some people and avoids too much keyboard-bashing! 💛